Step-by-step instructions for propagating orchids by cuttings at home

Refined orchids have become a popular indoor plant, harmoniously blending into any interior.
Self-propagation of exotic flowers is a painstaking work that requires certain knowledge.
Features of the process depend on the type of orchids. At first glance, this is a job for specialists, but following the rules, a beginner grower will cope with it. Learn more about the intricacies of the reproduction of orchids in our article.
What is cuttings?
Propagation of orchids occurs vegetatively (by dividing the bush, children or cuttings) and seeds. Note that orchid is not propagated by leaf, because its leaves do not have growth points. Reproduction by seeds is the most difficult option, only experienced flower growers resort to it. It is much faster and easier to grow an exotic beauty from a stalk. This method is recommended for monopodial orchids (Phalaenopsis, Vanilla, Wanda).
 Cuttings are a way in which a plant can be propagated by rooting part of the shoot, stem or even leaf. As the stem of an orchid, use the top of a plant or a peduncle cut into pieces. The apical stalk of an orchid is cut along with aerial roots. Damaged areas are treated with activated carbon or fungicide. Such a stalk is immediately planted in pots with a special substrate and placed in a greenhouse. A mother plant is placed next to it. In a warm and humid microclimate, the top will take root quickly, and new shoots will appear on the remaining hemp.
Peduncles from cuttings will require more attention. How the orchid reproduces in this way - we will analyze in detail.
Important. For cuttings, a flower is suitable from the age of three years, with a healthy root system and leaves.Advantages and disadvantages of the method
The main advantage of grafting is the new plant inherits all the qualities of a mother's orchid. This is important for rare and valuable varieties. Material for cuttings is always available, and for the development of children requires the creation of special conditions - contrasting temperature and humidity mode.
The disadvantages of the method include the possible death of cuttings. Not all of them let the roots, some simply rot. Another disadvantage is the long waiting period for the rooting of the process. For a month or longer, he will be kept in a greenhouse and in need of care.
Recommendations for choosing the shoot of the peduncle
The beginning of spring is the optimal period for the propagation of orchids. During the winter, they gained strength and prepared for the period of active vegetation. For cuttings, a peduncle is taken that has completed flowering. On a long stem are several sleeping buds. The plant must be healthy, you can not use material from an orchid that has undergone stress.
It is necessary to prepare for propagation by cuttings. For work you will need:
- scalpel or sharp knife;
- antiseptic;
- Activated carbon;
- a plastic container with a lid, a bag or a plastic bottle for a greenhouse.
How to propagate - step by step instructions
At home, propagation by cuttings should be carried out as follows:
- Disinfect a sharp knife (scalpel) with alcohol or an antiseptic.
- Cut the peduncle as close to the base as possible.
- Depending on the length of the stem, it is divided into parts of 10-15 cm. Each bud should have 2-3 buds. When cutting, note that the kidney should be located as low as possible.
- Treat all sections of cuttings and the parent plant with activated carbon powder or brilliant green. This will protect the plant from infection through the damaged area.
- Sphagnum moss is placed at the bottom of the container and moistened. Cuttings are laid horizontally on the surface of the moss. Make sure the axillary kidney is pointing up. They do not need to be buried or covered. To activate root formation, it is recommended to spray the substrate with a solution of the biostimulator for Augustine orchids. The norm of use is 1 tablet per 1.5 liters of water.
- To create a greenhouse, a plastic container with a lid having openings for ventilation is suitable. You can use a pot or other container. The main condition is to cover the greenhouse with film or glass. This will provide a consistently high level of moisture required for root formation.
- The container with cuttings is placed in a warm place where the temperature is not lower than 25 °.
- Care of the processes consists in periodically moistening the substrate. Watering is carried out using a spray gun. Humidification is performed with warm water. Watering schedule - every 3-4 days. The appendages should have enough lighting, but they should not be exposed to the sun. This will provoke an increase in temperature in the greenhouse. If necessary, additional lighting is used with fluorescent lamps.
After a month, 2-3 leaves and roots will appear on the cuttings. They can be transplanted into separate pots.
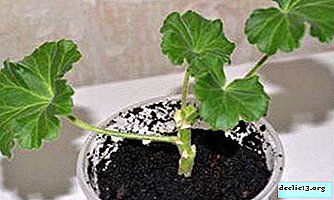
Photo
Below you can find a photo of the propagation of orchids by cuttings.


Possible problems
The first roots on the processes have to wait about a month. But not always the process of reproduction gives the desired result. A common cause of failure is a violation of sterility guidelines.
Some gardeners sprout a stalk with a kidney not on sphagnum, but on water. This method gives a low percentage of positive results. Under the influence of light, bacteria that cause decay quickly multiply in the water. Activated carbon and frequent fluid changes can be used to improve the situation.Using contaminated tools can infect the appendix with bacteria or fungus. This problem also arises among specialists. Thanks to practical experience, they found a way to solve it - at the first signs of mold, the process is immersed in a solution of potassium permanganate for 40-50 minutes.
Transplant into a pot
A stalk with leaves and roots is transplanted into a separate pot. The whole process is not needed, only the baby grown from the kidney is separated. For a young plant, it is necessary to prepare a substrate.
It will require:
- boiled pine, boiled, dried and cut into pieces 8-10 mm in size;
- charcoal;
- moss sphagnum, previously soaked in a solution of potassium permanganate;
- fine expanded clay or pebbles for drainage, heat-treated.
The flower pot should be plastic, transparent, with a large number of openings providing free access to air. It is recommended to disinfect it before planting. The transplant process is as follows:
- A layer of drainage is poured into the bottom of the pot.
- The baby grown on the handle is placed in the middle of the container.
- The bark is mixed with charcoal in a pot.
- Sphagnum moss is laid on top.
- The substrate is moistened from the spray with warm water.
- A pot with a seedling is placed in a bright place. Exposure to direct sunlight and draft should not be allowed.
- The next watering is carried out after 3 days.
Follow-up care
Frequent and plentiful watering is not necessary for an orchid Successful rooting is only the first step in breeding orchids. Young plants need to create optimal conditions for growth and development. An exotic flower needs to be lit for at least 12 hours a day. It is recommended to place it on an east or southeast window. Comfortable temperature depends on the type of orchid, but the average for summer is 18-25 °, and for winter - 12-15 °.
Watering regime varies significantly depending on the time of year. In spring and summer, during the period of activity and flowering, the orchid is moistened 1-2 times a week, in winter - 2 times a month. Specialists determine the need for watering by the color of the roots, when they become light - it is time to moisten the plant.
Top dressing of a young plant begins 2 weeks after planting. Use a special complex fertilizer with minerals and trace elements. A feature of the application is a reduction in the recommended dosage by 3-5 times.
Accelerated growth contributes to fertilizing with a high nitrogen content. It is performed 2 times a month. When the orchid grows, it is transplanted into a more spacious pot.
Tip. For precaution, a pot with an orchid seedling can be kept in greenhouse conditions for another 2 weeks.High air humidity is a significant factor for a comfortable orchid condition. Depending on the variety, the recommended moisture content is 60-70%. The plant is good for spraying. It is contraindicated only in orchid flowers.
An orchid propagated by cuttings blooms in the second or third year of life. This gentle and moody plant requires competent and systematic care. Subject to the requirements for reproduction and maintenance, it will respond with excellent flowering.
Watch the video: How to propagate Orchids through divisions - Simple guide for beginners (May 2024).


-
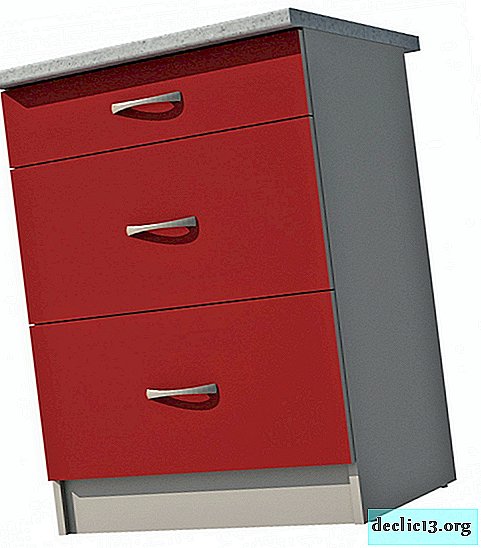
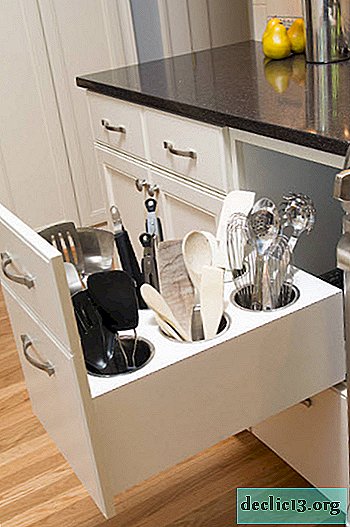
What are the kitchen cabinets, models with drawers
The kitchen is a small kingdom of each mistress, a sacred place where a kind of ritual takes place - the sacrament of cooking. It’s important not only all kinds of appliances, equipment to facilitate the work, furniture also plays an important role, because every thing should be in its place. Such a piece of furniture as a kitchen cabinet with drawers has long earned recognition among buyers, remains a mandatory, indispensable element of the interior. ... -
-
-